Low-cost tunnels & shade netting for smallholders
You don't need a commercial greenhouse to get the benefits of protected cropping — here's how to build an affordable low-cost tunnel or shade-net structure in Zimbabwe that actually keeps your crop cool and alive.
A commercial fan-cooled greenhouse is out of reach for most smallholders — and, honestly, it’s overkill for most crops. A simple, well-oriented tunnel or shade-net frame gets you most of the benefit for a fraction of the cost, as long as you get three things right: orientation, ventilation, and covering grade. Here’s how to build one that actually works.
Not sure where to start? Read the full greenhouse & tunnel farming starter guide first, then come back here for the build.
Shade net vs plastic tunnel: pick the right tool
| Option | Materials | What it controls | Best for |
|---|---|---|---|
| Shade net frame | Timber/bamboo poles + graded shade net | Sun scorch, hail, some flying insects | Nurseries, leafy greens, hardening off seedlings |
| Basic plastic tunnel | Timber or light steel hoops + UV-treated poly film + insect screen on open ends | Rain, frost, most flying pests, some temperature lift | Tomatoes, peppers, off-season crops |
Both are dramatically cheaper than a fan-pad cooled greenhouse, which needs continuous electricity and clean water and is flagged in the research as often out of reach for resource-poor farmers (UKZN). For most smallholders, natural ventilation is the only realistic — and genuinely effective — option.
Get the orientation right from the start
Orient your tunnel east–west, the same layout used in comparative research trials on tunnel greenhouses (UKZN). This spreads the sun’s path more evenly along the length of the structure through the day rather than baking one end, and it lines the roof ridge up with the prevailing wind direction where side vents are used — helping natural airflow do its job.
If you’re building more than one tunnel, space them apart rather than butting them together, so each one gets its own airflow rather than shading or blocking its neighbour.
Build ventilation in, don’t bolt it on afterwards
This is the single biggest mistake first-time tunnel builders make: they focus on the covering and forget the openings. Natural ventilation — roof and/or side vents, plus insect-screened open ends — is the cheapest, simplest and most energy-efficient way to manage the climate inside a tunnel, using nothing but wind and rising warm air (UKZN). Design for it from day one:
- Leave both ends open and cover them with insect-proof screen netting rather than solid plastic — this is standard practice on naturally ventilated tunnels and lets warm air escape while keeping most flying pests out (UKZN).
- Add roll-up side vents along the length if your budget allows — even simple flaps you can prop open in the heat of the day and close at night make a real difference.
- Don’t skimp on vent area. The bigger the opening relative to the tunnel’s volume, the better the air exchange — research on side-opening tunnels found meaningfully better humidity and temperature control with larger ventilation openings than with small ones (UKZN).
Remember: a sealed tunnel in Zimbabwean sun has been recorded reaching internal temperatures as high as 45°C (UKZN, citing Mashonjowa et al.) — hot enough to cook a crop, not just stress it. Ventilation is what keeps your investment alive, not an optional extra.
Choosing your shade-net grade
Shade net is sold by the percentage of sunlight it blocks — lighter grades let more light through, heavier grades block more sun and heat. As a general rule for Zimbabwean conditions:
- Lighter shade grades suit crops that still need plenty of light — leafy greens and hardened-off seedlings that just need protection from scorch, hail and the worst midday sun.
- Heavier shade grades suit nurseries in the hottest months or delicate seedlings straight after germination, where reducing light and heat load matters more than maximising growth.
Because exact percentage recommendations vary by crop, altitude and season, message us with your crop and location and we’ll help you pick a grade rather than guessing off a generic chart.
What a basic build looks like
You don’t need galvanised steel and UV-rated film to get started — plenty of smallholders build a first structure from:
- Timber or bamboo poles set firmly in the ground as the frame (upgrade to steel later if the crop justifies it).
- Shade net or UV-treated polyethylene film stretched over hoops or a simple ridge-and-purlin frame.
- Insect screen netting on the open ends and any side vents — this is what keeps whitefly, aphids and moths out while air still moves through.
- A well-drained, sun-exposed site, isolated from existing plantings of the same crop family to reduce pest and disease carry-over — the same principle used for professional seedbed siting (KZN Dept of Agriculture).
Keep sanitation simple but consistent — clean tools and hands between plants, and remove any diseased material promptly, the same basic hygiene commercial tunnel operations rely on to keep a crop healthy for months at a stretch (Seed Co).
The structure protects the crop — the soil still feeds it
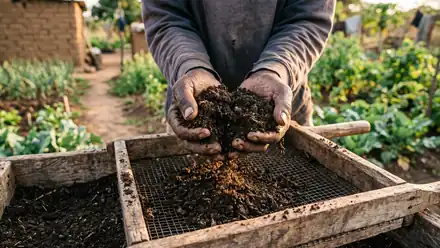
Whatever you build, don’t stop at the frame and covering. A tunnel controls weather and pests; it does nothing on its own to fix depleted, sandy soil. Organic matter has to be built into the bed deliberately (FAO Soils Bulletin 56) — work in PCAT BLOCK C Organic Compost or your own home-made compost before you plant, and test your soil first so you know what you’re fixing.
Do this now
- Orient east–west if you’re building a tunnel, and space multiple structures apart.
- Design ventilation in first — screened open ends, and side vents if you can afford them.
- Match your shade-net grade to the crop and season — ask us if you’re unsure.
- Site it well — sun-exposed, well-drained, away from same-family crops.
- Build the soil under it with compost before you plant a single seedling.
PCAT BLOCK C — the locally-made, field-proven compost that rebuilds Zimbabwe’s tired, acidic soils, inside a tunnel or out.
Related: greenhouse & tunnel farming starter guide · raising strong vegetable seedlings · drip irrigation on a budget
- UKZN — Comparative analysis of two greenhouse structures (orientation, ventilation, cost barriers)
- Seed Co — Tunnel Tomato Production Guide (structure, sanitation, spacing)
- KwaZulu-Natal Dept of Agriculture — Tomato production guide (seedbed siting and airflow)
- FAO — Soils Bulletin 56, on-farm composting (soil as foundation under any structure)
Join our free mailing list and we'll send the full 2026/27 calendar plus weekly seasonal tips.