Growing garlic in Zimbabwe: small plot, serious value
A practical guide to garlic farming in Zimbabwe — winter planting windows, clove selection, raised-bed soil prep with compost, spacing, feeding, curing and storage, for growers targeting the country's largely imported garlic market.
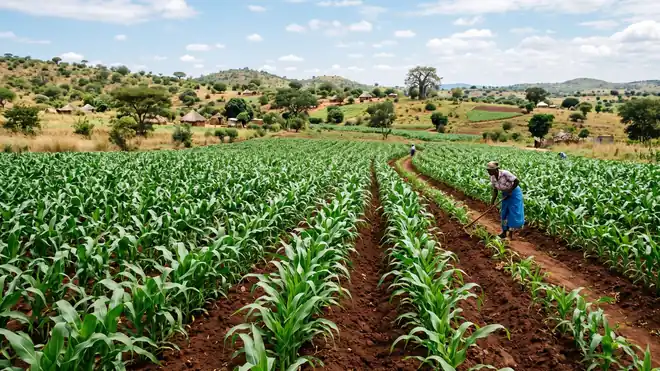
Walk down most supermarket veg aisles in Zimbabwe and the garlic on the shelf has usually travelled a long way to get there — most of what’s sold locally is imported, exactly the gap a small, well-run plot can step into. Garlic doesn’t need hectares to be worth growing: it’s high-value per square metre, it stores for months once cured, and Zimbabwe’s cool, dry winter suits it well. Here’s how to grow it properly, from clove to cured bulb.
Already growing onions? Garlic is its sibling allium — see growing onions in Zimbabwe for the shared soil and storage logic between the two crops.
Garlic planting calendar at a glance
| Stage | Timing / spec |
|---|---|
| Best transplant window | August–April (Highveld), January–May (Lowveld) |
| Local Agritex planting guidance | April–May, optimum growth 12–16°C |
| Propagation | Cloves (segments of bulb), not true seed |
| Seed rate | 900–1,100 kg/ha of cloves (Agritex); ~315–500 cloves/ha (SNV manual, via CFU) |
| Row spacing | 20 cm between rows, 8–10 cm between cloves in-row |
| Planting depth | Tip of clove just above ground level |
| Soil pH | 5.5–6.0 |
| Watering | To field capacity at each irrigation; cease 1 month before harvest |
| Days to maturity | 4–6 months (Agritex); 4–9 months depending on variety (SNV manual) |
| Harvest window | August–October (dry conditions) |
| Expected yield | 8–12 t/ha with good management |
| Storage (0°C, 65% RH) | 28–36 weeks |
Figures drawn from the Agritex Zimbabwe Farm Management Handbook and the SNV Horticulture Trainers Manual as cited by CFU Zimbabwe.
The opportunity: high value, small footprint
Garlic earns its place on a small plot because the value per square metre is genuinely high, and most local garlic on the shelf is imported — precisely why ZimTrade has been pushing local production and export-readiness for the crop (CFU Zimbabwe, citing ZimTrade). The upside isn’t theoretical: a Gutu district contracting programme has drawn more than 1,000 rural farmers growing garlic under organic manure and irrigation, sold to a buyer at around US$4 per kilogram, with some farmers reportedly earning up to US$8,000 in a year (CFU Zimbabwe; CFU Zimbabwe). That’s a real, documented outcome from smallholder plots — exactly the kind of return that justifies serious soil prep on a crop that doesn’t need much land.
Winter and cool-season timing
Garlic is frost-hardy but can’t handle high temperatures, and needs a genuine cool period to grow well — optimum growth sits at 12–16°C, with the best local planting window April to May according to Agritex (Agritex Zimbabwe Farm Management Handbook). The SNV Horticulture Trainers Manual gives a broader transplant window of August–April on the Highveld and January–May in the Lowveld (as cited by CFU Zimbabwe) — track your start date to your local altitude and temperature rather than a single fixed date. Bulbing is triggered by longer days and higher temperatures, followed by exposure to lower temperatures (Agritex) — the same daylength-and-temperature interplay that governs onion bulbing, which is why the two crops share a growing logic.
Garlic also comes in two broad types worth knowing before you buy planting material: hard-neck varieties, more winter-hardy with larger cloves but shorter storage life, and soft-neck varieties, which store longer — alternating between the two can help you use land continuously across the year (CFU Zimbabwe).
Planting cloves, not seed — and why clove size matters
Unlike most vegetables in this series, garlic isn’t grown from true seed. It’s propagated from cloves — individual segments of a mature bulb (Agritex). This makes sourcing clean planting material genuinely important:
- Use the biggest, healthiest cloves you can find — bigger cloves reliably give more vigorous, higher-yielding plants (Agritex).
- Separate cloves carefully. Double cloves stuck together produce twin plants and misshapen bulbs that grade poorly.
- Check the source of your planting material for nematodes and disease before you buy — nematode-infected cloves pass the problem straight into your soil.
Soil: loose, well-drained, and organic-matter-rich
Garlic wants soil that’s well drained, worked to good tilth, and rich in organic matter, at a pH of 5.5–6.0 (Agritex). If you haven’t tested recently, read your soil before you spend covers how to do this without wasting money.
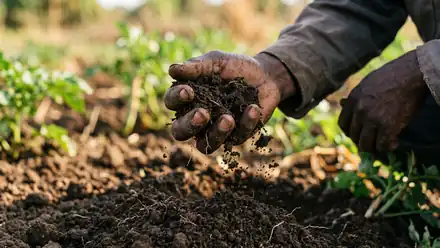
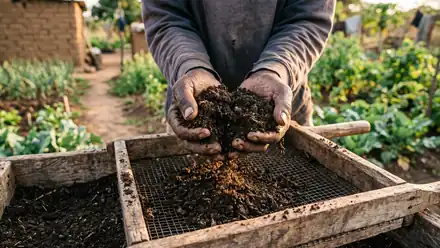
This is a structure story as much as a nutrient one. Garlic’s cloves need to push down into loose, crumbly ground, and bulbs need room to expand without fighting compacted soil — raised beds built with well-rotted compost give you both drainage in the wet and moisture retention in the dry, the exact balancing act garlic asks for through its long, slow bulking period. Garlic also responds well to organic manure (Agritex; CFU Zimbabwe) — a real advantage for smallholders with manure on hand from livestock, and a strong argument for compost as the foundation under whatever fertiliser programme you run.
This is where PCAT BLOCK C fits. Build your raised beds around PCAT BLOCK C Organic Compost worked in ahead of planting — the loose, well-decomposed structure garlic’s cloves and expanding bulbs need, holding moisture through winter’s dry stretches without waterlogging. Message us with your bed size and we’ll help you plan a rate.
Spacing and depth
Plant with rows 20 cm apart, cloves spaced 8–10 cm apart within the row (Agritex). Set each clove with the tip just above ground level — garlic pushes its own shoot up and doesn’t need deep planting like many bulb crops. Work the soil to a fine tilth first so the clove has good contact with no air pockets.
Feeding basics
Where mineral fertiliser is used on top of your compost base, the conventional guidance is:
- Basal: Compound C at 350–500 kg/ha (Agritex; CFU Zimbabwe, citing the SNV Horticulture Trainers Manual).
- Top-dressing: Ammonium Nitrate at 200–300 kg/ha, applied roughly monthly after planting (Agritex; CFU Zimbabwe, citing the SNV Horticulture Trainers Manual).
Both sources land on essentially the same numbers — a useful cross-check if you’re building a feeding plan from scratch. As with onions, this programme works better on top of good organic matter than alone — compost holds nutrients in the root zone instead of letting a light soil leach them away between waterings.
Watering — and the pre-harvest dry-down
Garlic should never be allowed to run short of moisture (Agritex). Water to field capacity at each irrigation, less frequently early on but increasing the rate during bulb enlargement, when demand is highest. Then comes the critical reversal: cease watering entirely about one month before harvest (Agritex) — this dry-down lets wrapper skins mature and seal, and skipping it is a common reason cured garlic doesn’t store as long as it should. Mulching between rows keeps moisture steady without constant irrigation — see mulching to beat dry spells, and drip irrigation on a budget for a small plot’s first setup.
When to lift: read the leaves
Garlic typically matures 4–6 months after planting, with harvest falling August to October in dry conditions (Agritex) — a wider reference puts the range at 4–9 months depending on variety (SNV manual, via CFU Zimbabwe). The signal to watch for is leaf die-back: as the bulb finishes bulking, foliage yellows and falls over, much like the signal used for onions. Lift slightly before full die-back rather than leaving garlic in the ground too long, where wrapper skins can split or bulbs regrow roots if a late rain catches you.
Curing, plaiting and storage
Once lifted, leave the bulbs to cure on the ground for about a week before moving them into storage (Agritex). Curing and storage conditions genuinely determine how long your crop lasts:
- At 26–32°C, garlic stores for only about 1 month (Agritex) — too warm, too fast.
- Intermediate temperatures (4.4–18°C) actually favour rapid sprouting (Agritex), and high humidity in that range causes mould — a trap for growers who assume “cooler is always better.”
- At 0°C and 65% relative humidity, garlic can store for 28–36 weeks (Agritex Zimbabwe Farm Management Handbook).
- Eliminate damaged or diseased bulbs before storage — neck rot and black mould turn bulbs black, and one infected bulb spreads fast through a batch.
Most smallholders won’t have cold storage, so the practical version is: cure well in a dry, ventilated space, store as cool as you reasonably can, and sell through steadily rather than holding indefinitely. Plaiting cured bulbs by their dried leaves into ropes also improves airflow versus piling them in sacks.
Selling angles: fresh green garlic vs cured bulbs
You don’t have to wait for full maturity to earn. Fresh green garlic — pulled young, before the bulb has fully divided into cloves — has its own market among restaurants and households wanting a milder, leafier product, and generates cash flow earlier. Cured, dry bulbs are the standard market product with the long shelf life buyers expect when asking for garlic by the kilogram. Running both — thinning some early for the fresh market while letting the rest bulk and cure fully — spreads your harvest labour and income across the season.
Frequently asked questions
When should I plant garlic in Zimbabwe? Agritex recommends April–May, closer to garlic’s 12–16°C optimum (Agritex); the SNV Horticulture Trainers Manual gives a wider window of August–April on the Highveld and January–May in the Lowveld (via CFU Zimbabwe).
Do I grow garlic from seed? No — garlic is propagated from cloves, segments split off a mature bulb (Agritex). Use the largest, healthiest cloves for the most vigorous plants.
How long does garlic take to mature? Roughly 4–6 months, harvest typically August–October (Agritex); some varieties run 4–9 months (SNV manual, via CFU Zimbabwe).
Why does garlic need a dry spell before harvest? Ceasing irrigation one month before harvest lets wrapper skins mature and seal (Agritex) — skipping it is a common reason cured garlic underperforms in storage.
How long can I store cured garlic? At 0°C and 65% relative humidity: 28–36 weeks (Agritex Zimbabwe Farm Management Handbook). Warmer storage (26–32°C) cuts that to roughly a month.
Is garlic really worth growing on a small plot in Zimbabwe? Most garlic sold locally is imported, and documented smallholder programmes — including one in Gutu district involving over 1,000 farmers — show real income from small plots grown under organic manure, with buying prices around US$4/kg (CFU Zimbabwe).
Do this now
- Source clean, disease-free cloves and use the biggest ones for planting.
- Test your soil and target pH 5.5–6.0 before building your beds.
- Build raised beds with well-rotted compost or PCAT BLOCK C — garlic’s structure needs are as much about drainage as nutrition.
- Plant cloves tip-up, 20 cm between rows, 8–10 cm in-row.
- Water to field capacity through bulking, then stop entirely one month before harvest.
- Watch the leaves, not the calendar — lift as foliage begins to yellow and fall over.
- Cure on the ground for about a week, then store cool and dry, grading out any damaged bulbs first.
PCAT BLOCK C — the locally-made, field-proven compost that rebuilds Zimbabwe’s tired, acidic soils.
Related: growing onions in Zimbabwe · read your soil before you spend · mulching to beat dry spells
- Agritex Zimbabwe Farm Management Handbook — Garlic Production
- CFU Zimbabwe — High export potential in garlic (SNV Horticulture Trainers Manual, Trade Map, ITC prices)
- CFU Zimbabwe — Forex boon for 1000 Gutu garlic farmers
- CFU Zimbabwe — Increase garlic exports, farmers urged (ZimTrade)
- Seed Co Vegetables Grower's Guide
- CABI Digital Library — Allium sativum (garlic) Compendium
Join our free mailing list and we'll send the full 2026/27 calendar plus weekly seasonal tips.